
One labeled screenshot beats a thousand menus. Here is the chart screen with its six working areas marked, and what lives in each.
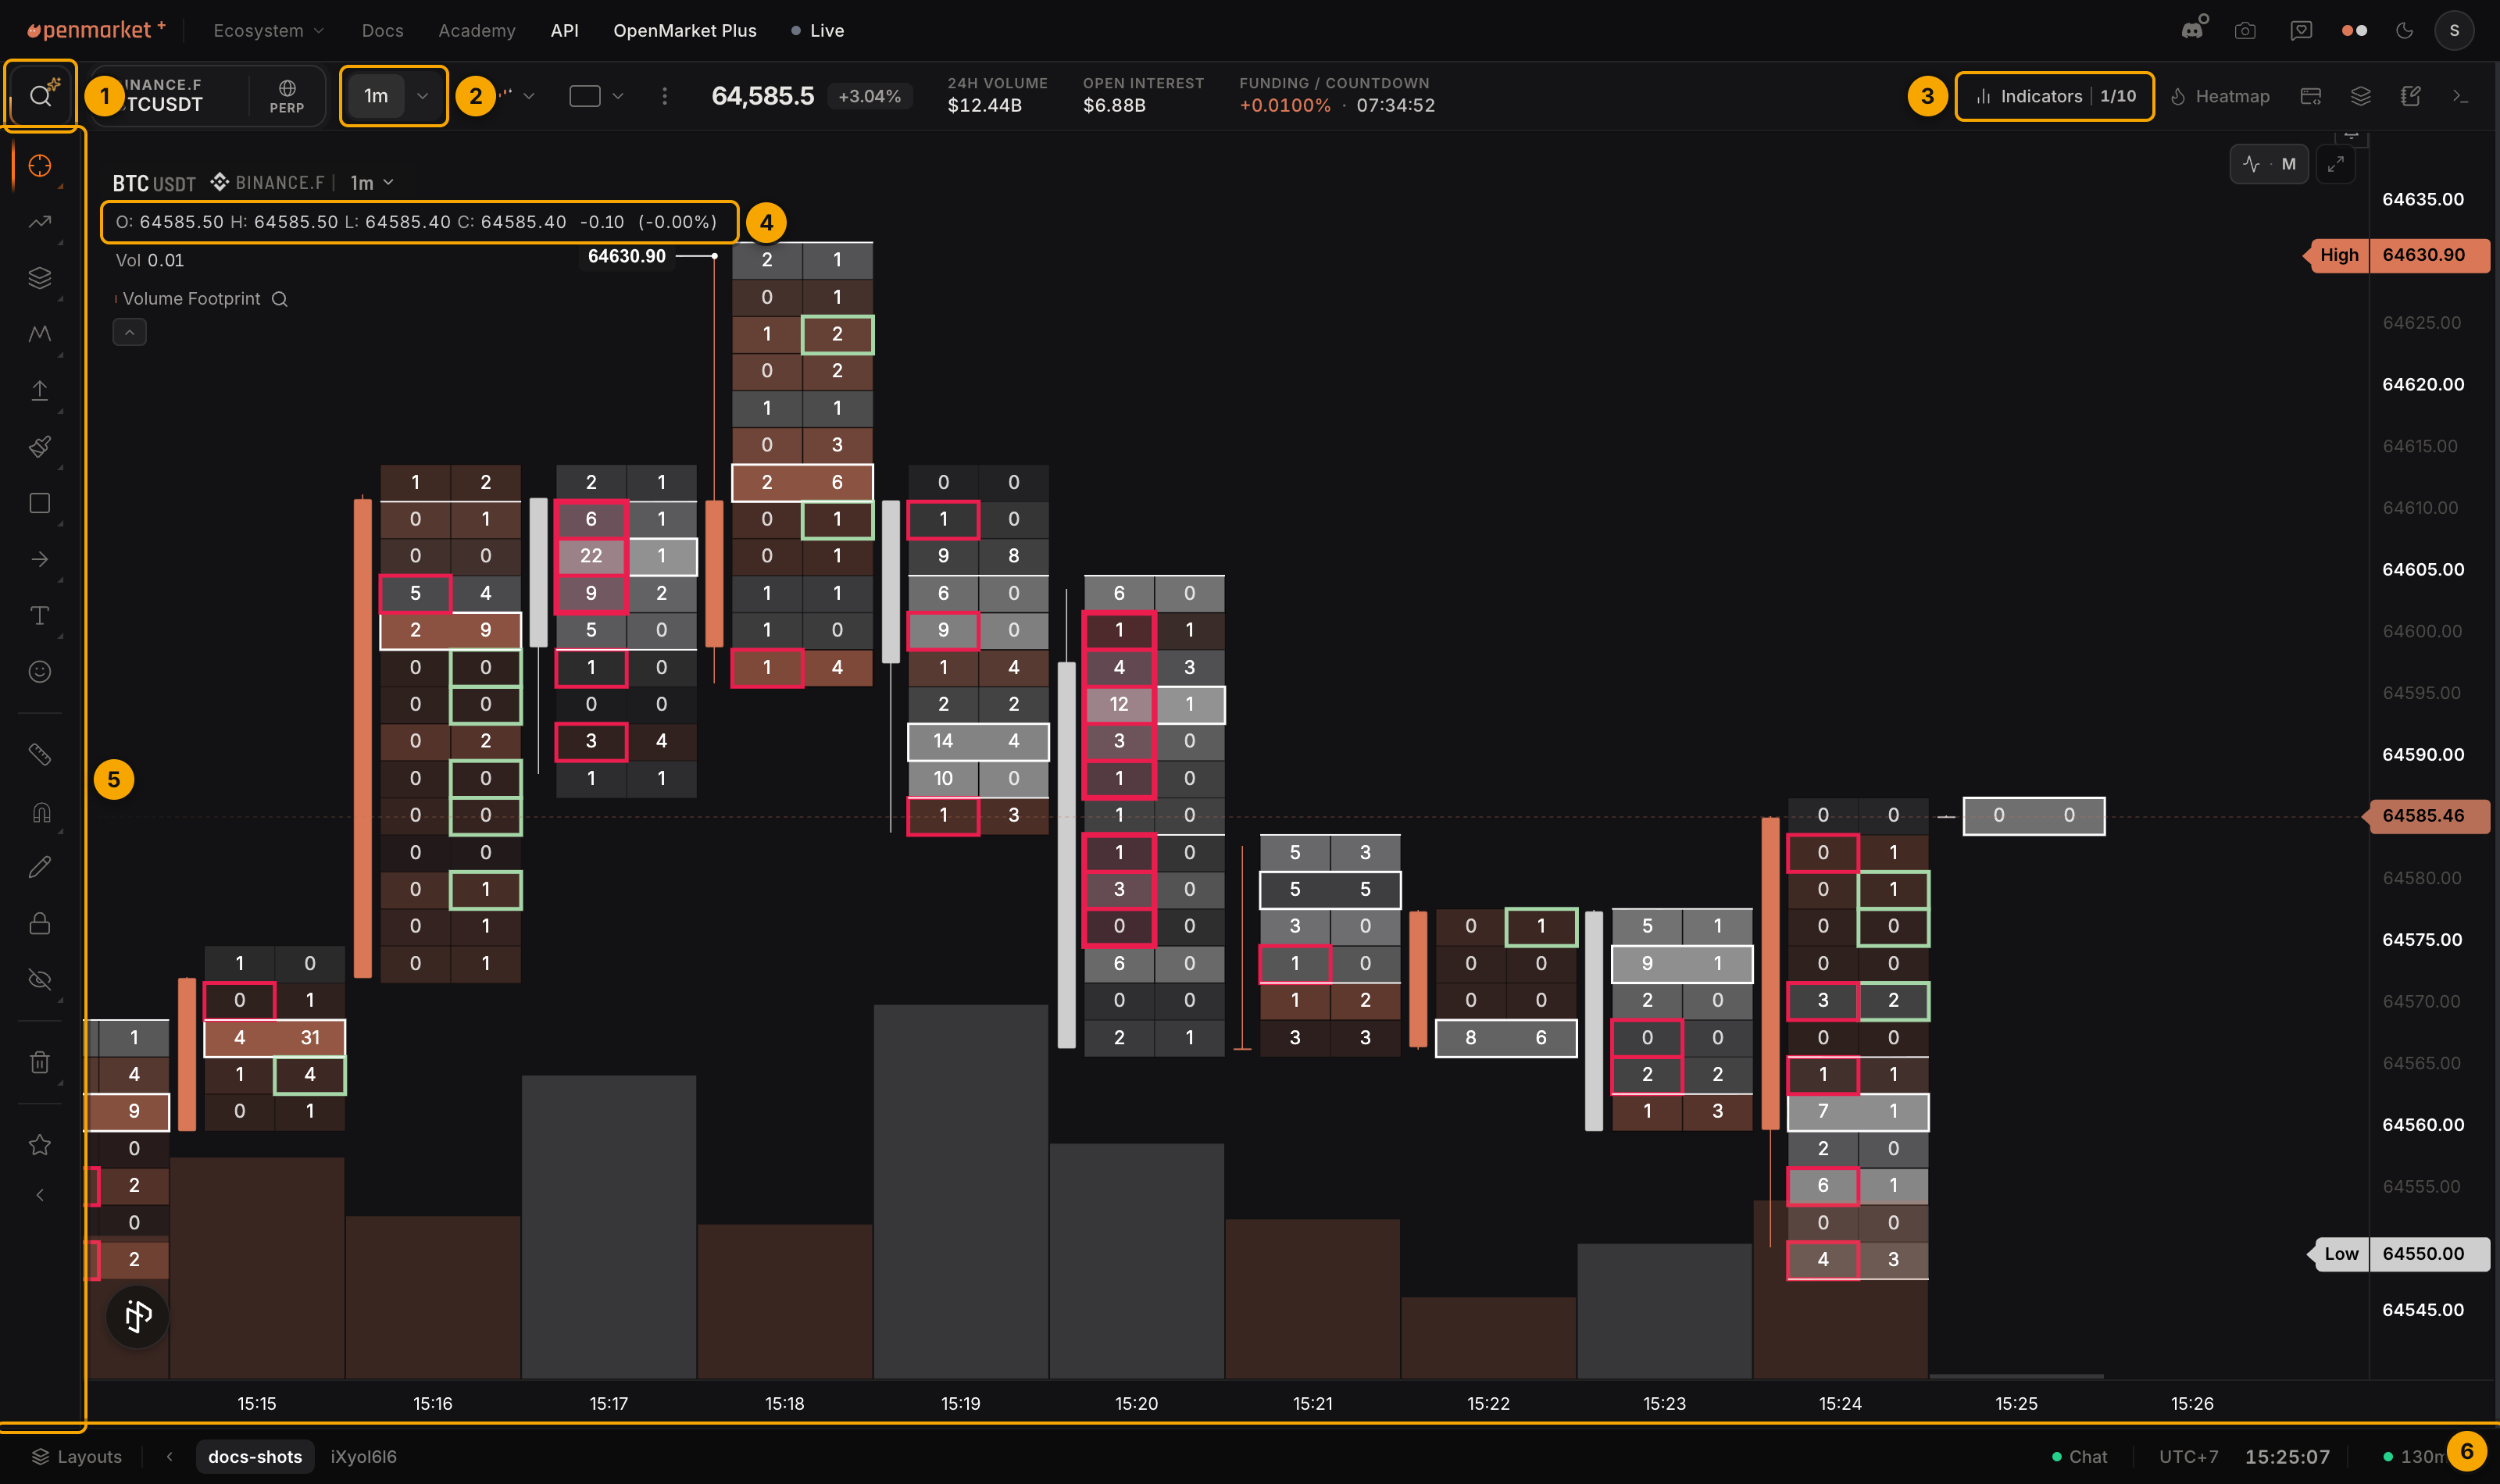
1. Symbol search
The top-left block shows your current exchange, ticker, and market type. Click it (or just start typing on the chart) to search everything the platform serves: crypto spot and perps across exchanges, Polymarket prediction markets, equities, and macro series. Hovering the block opens quick search with your recent symbols.
2. Interval and chart type
The chips switch timeframes with one click; the dropdown holds the full list and remembers your favorites. Digit keys switch intervals from the keyboard. Next to intervals sits the chart type selector: 15 types from classic candles to hollow candles, Heikin Ashi, baseline, and the order flow native types, footprint and TPO.
3. Indicators and top-bar tools
Indicators opens the library (official indicators by category, community scripts, suites, and your favorites). Beside it sit the heatmap toggle and the panel controls for widgets and multi-chart layouts. The counter next to Indicators shows your plan's per-chart allowance.
4. The legend
Every series on the chart gets a legend row: the symbol itself plus each indicator. The row is the indicator's cockpit: hover for live values, click the gear for settings, the eye to hide, the cross to remove. Deep-dive settings for the flagship indicators are documented in Order Flow.
5. Drawing tools
The left toolbar holds 99 drawing tools in 9 groups: lines, arrows, Gann and Fibonacci, patterns, forecasting, annotations, shapes, freehand, and emoji. Long-press a group to fan it out, star tools into your favorites strip, and use the magnet for precise anchoring. Every tool has per-tool settings and your drawings persist per symbol.
6. The footer
Workspaces and layouts live bottom-left: name, duplicate, and switch workspaces, or browse community layouts. Bottom-right holds the chat, clock, and connection health. The footer is also where new-feature announcements surface, so an unfamiliar button here is usually worth clicking.